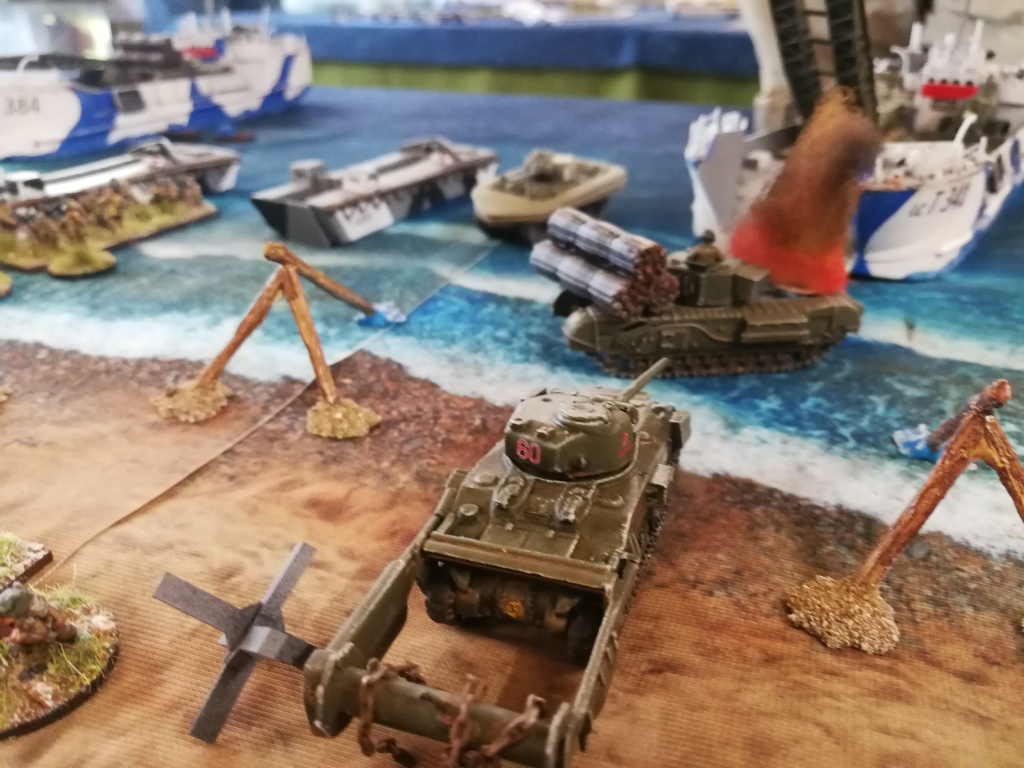
COD, Sword beach, 1944. Where Company Commanders get their chips. 15mm, IABCM

The other weekend saw myself, Philip and Ru descend on Desmondo’s shed o’war to take part in another of his magnificent D-Day games (which have been documented here before). Once again I would be taking the part of ze Germans mainly as I had a very heavy night the night before so had hardly any sleep plus a quite substantial hangover so needed to reduce decision making as much as possible!

In a nice change from previous attempts at this scenario Des had increased the run in for the assault wave which helped Ru get to grips with the rules for the game and also increased the chances of things going wrong a bit too. After each landing craft or DD tank is moved we check to see if they ‘drift’ left or right and if they hit another vessel then things can go bang or head downwards quite rapidly and there’s also the added joy for the DD crews that they might get swamped. These fun and games did lead to Ru losing his Company HQs although nearly all of the DD tanks made it to the shallows and now I was hoping for the chances of the incoming vessels striking mines working in my favour to further write down the attackers. This didn’t go so well with only two boats hitting a mine which caused heavy casualties to one of Ru’s platoons although Philip’s lads fared a lot better, just being badly shocked. It was going to be a tough fight for the defenders.

Once on the beach I could start to engage the invading forces but unfortunately for me the two AT guns I had off table positioned to fire down the beach both had very, very low amounts of available shots (I rolled for this before we started and had 1 shot in 1 gun and 2 in the other!) so I had to choose the right moment to use them and also hope that when those moments did come up I had the dice available to activate the guns. Luckily for me they did and although one of my 3 shots missed the other 2 both brewed up vehicles (Ru’s Fascine carrying AVRE and Philip’s Sherman Crab) as they reached to bottom of the ramps of the LCT’s blocking the way for the following vehicles to exit. This would force the craft to back up and land again which would not only slow things down for the Brits a tad but also would mean that they might strike a mine whilst doing so, which unfortunately for me didn’t happen.

So, the majority of the assault troops were now ashore and so was a fairly sizable amount of supporting armour and various Funnies all intent on giving me a very hard time. My MG nests, infantry and mortars were doing their bit now too as was the one artillery strike I managed to call in but I couldn’t prevent Philip’s infantry from making it to the sea wall in front of my position even though they were caught in a particularly harsh bout of firing from my lads (a double phase was involved) and suffered quite a few casualties. Ru’s command was heading over to the right away from the defensive nest and hence suffered less casualties, all his tanks being safe as the AT gun facing that direction was about as accurate as a fairground air rifle! Pretty soon the Brits started knocking out the AT bunkers by concentrated fire from DD Shermans and AVRE’s chucking their dustbins of doom at me and the writing was pretty much on the wall from then on.

Ru was the first one to get off the beach with his Shermans and Infantry taking advantage of the AVLB bridge and then proceeding to blow chunks out of the right hand side of the post whittling down the defending infantry in short order before then starting to advance his infantry further inland. Phil had his bridge up against the seawall shortly afterwards and tried a rush with an infantry platoon first which I managed to repulse whilst he dropped a fascine on the left of my position which enabled a DD and a bulldozer to exit the beach. I managed to knock out the bulldozer by a lucky shot on the driver. It was about now when the second wave consisting of another Infantry company plus armour was heading into the beach and Philip took command uttering the famous phrase “Don’t worry I know what I’m doing” and then promptly colliding two of his boats together sinking one! I then added injury to the many insults we were all chucking his way by hitting another boat carrying his Company HQ in with a mortar stonk, killing the CO. Meanwhile on the beach, he was having a better time and decided to stop fannying about and launched an AVRE up his bridge which proceeded to literally crush the resistance of the infantry at the front of my position whilst also shrugging off an attempt to knock it out from my remaining AT gun. When he managed to take out this final surviving AT asset with his infantry pouring up the bridge behind now unopposed, with Ru’s Shermans behind my position and the second wave landing I decided the gig was up and I chucked in the towel.

Once again it was a bloody marvellous day’s wargaming all carried in the greatest of sprits and I’d like to thank Des for hosting us and Ru & Philip for being such great opponents, what the hobby is all about.

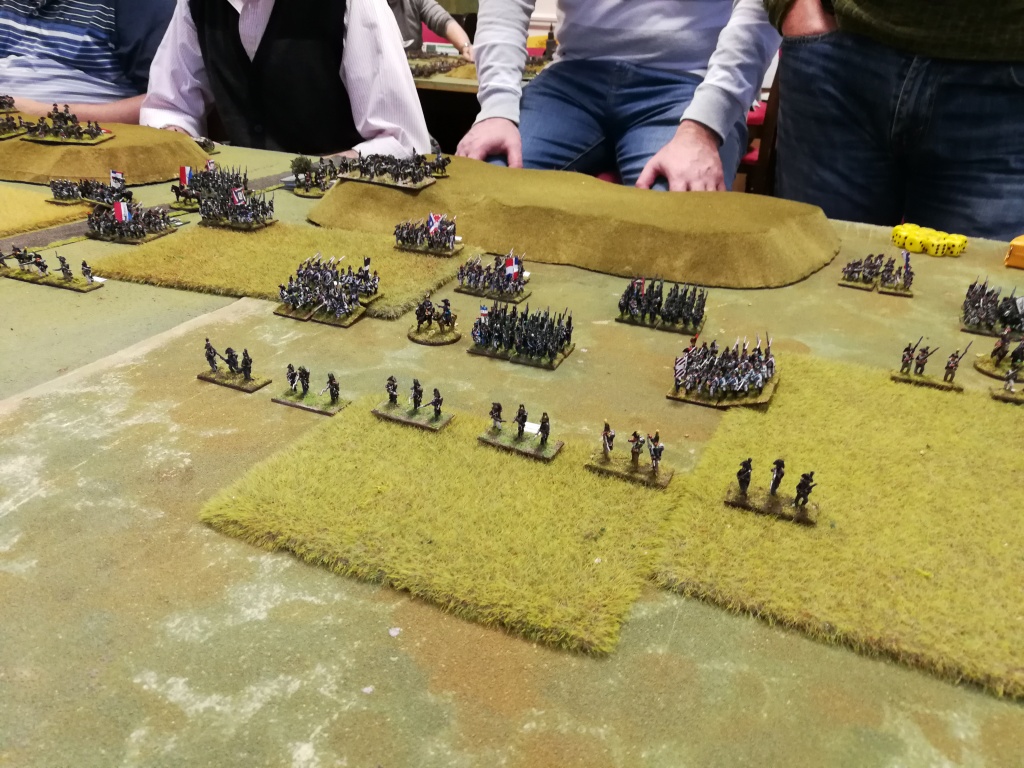
Longstreet’s Attack 2: 28mm ACW, Picket’s Charge

Last Saturday saw me once again round Des’ for another bash at his Longstreet’s Attack scenario. I would be playing with Per again and this time we were joined by John, a real life former General and a fantastic bloke to boot, and we would have also been playing with Dave Brown too but he had come down with Covid so had to drop out. Due to Dave dropping out Des joined me on the Confederate side and we got to it. This time round all the tweaks that we had discussed from a month of playtesting the scenario, and a Zoom call Des had with Dave, were put into place and it made a very nice difference to the game. As Des is planning on writing the scenario up for a possible magazine article or to post somewhere I won’t go into them here but I can assure you that it is a scenario that is well worth playing, this was the 3rd time for me and I had a blast each time.

Again I won’t do a blow by blow account as the day was pretty full on and I didn’t make any notes during the game. By the time we finished off the game Des’ second wave had just managed to gain a foothold in the Wheatfield and he was gearing up for another assault on the ridge in the centre after the first attack was successfully repelled by Per (whose dice rolling was on fire all day which helped considerably!). To the right of this however, his Texans had been wiped out in their attempt to take the ridge and next to them my Georgians had finally managed to take Devil’s Den but at an awful cost and were just about to be counter attacked. There was no way that they would have been able to survive this as all the remaining units were very near dispersal and that would have opened up a huge gap on the right of the line here which the flood of reinforcements the Union side were receiving could have exploited given time. Meanwhile over on the extreme right, my Texans had been wiped out in their attempt to turn the Little Round Top position but the Alabamans had very handily kicked the Federals off of the feature and were preparing to advance on the new, frankly terrifyingly strong, line that John had prepared to meet them.

As usual it was an absolutely cracking days wargaming, played in the best spirit and with tons of great fun moments in it. Anyway, here’s another large selection of eye candy to enjoy – remember if you click on a photo it enlarges!

Beyond Le Plessy, Normandy 1944. 15mm IABCM

Sunday saw myself and Philip pitch up at Des’ shed o’war to play the second game in his set of linked battles of a (fictitious) British attack on German positions north of Caen in 1944. I had played the first game against Des a few weeks ago but I stupidly forgot to charge my phone so couldn’t take any pictures hence the lack of report on it! Figures and models are all 15mm from Des’ stunning and impressive collection and all the lovely terrain is his as well. Rules used are our dice activated version of IABSM -I Aint Been CoC’d Mum, as seen in the 2019 Lardies Annual.

‘O’ Group, Btln. HQ, 14 Essex Regt, just North of Plessy:

“Right then chaps, listen in. Yesterday ‘A’ Company tried to break through and suffered a bloody nose from some very determined defenders from Kampfgruppe Darchin. However they did manage to write down the Jerry forces (we expect the defenders to be short at least one platoon and definitely 2 Panzer IV’s) and secure a good start line for todays attack running through the two orchards and the village. 1 Platoon from A Company has remained in the north part of the village and will be under command for today’s action, you will also be supported by battalion 3″ mortars and a troop of Churchills from Brigade’s attached Squadron, I have ordered up a stonk from the Gunners too which will be your cue to get the ball rolling. Your task is to take the remainder of the village and breach any further defences to open the road to Caen. I’ll leave you to co-ordinate with mortars and tanks. Good luck.”

‘O’ Group, C Coy. 14 Essex:

“Alright then everyone it’s our turn now. When the artillery starts to land on the orchard behind the village I want 9 Pltn to push forward a small patrol from their position in the right hand orchard through to the end of the orchard across the road to try and spot if the Jerries have anything in the Farm complex or along the hedges between there and the orchard that is getting stonked, once patrols are back then to advance through orchard, take any enemy under fire and develop attack either on the farm or into the central orchard beyond the village. 7 Pltn is to move through the orchard it is located in on the left to the end nearest enemy and then locate any enemy in the wood to the front. Once located enemy is to be engaged with fire then assaulted if feasible. 8 Pltn is to deploy behind 7 Pltn and pass through on my order to carry on the attack on the left flank which will be the main effort. Once they are moved through then 7 Pltn will act as Coy reserve. 1 Pltn, A Coy is to clear the rest of the village and then will be deployed to either support the attack on the woods or to the right flank. Troop of Churchills to be deployed as I see fit to either shoot infantry into positions held by enemy or tackle any armour. Once the line of the wood to the farm has been secured then await further orders. All clear? Good. Questions?”

cof
cof

And so we began…

There was a German blind in the village immediately to my front which I quickly scouted out to find it was nothing more than a few stay behinds making noise as cover for the enemy to withdraw. With that knowledge I started moving 1 Pltn forward all the time trying to spot any nasty surprises in the wood to the left. At the same time I moved my own patrols forward on the right (dummy blinds) to try and spot any Germans in the farm or in the vicinity of the central orchard. As both dummy blinds spotted nothing I then moved 9 Pltn forward until they reached the end of the orchard where they finally were fired upon by the survivors of the enemy section that had withstood the pre-game stonk of the orchard. They also drew the attention of a Panzer IV lurking next to the farm! 1 Pltn had also spotted a Panzer IV lurking in the wood and both platoons swiftly got their 2″ Mortars busy smoking the enemy tanks to block their view. 1 Pltn quickly dashed for cover in the houses and gardens to avoid the incoming HE fire from the tank but also sent their PIAT team forward in a dash to the garage building at the end of the village. This building looked like it could be used to get a tricky shot away on the tank in the woods and 216 Jenkins on the PIAT quickly made his way up stairs and to the window. Having a spring action bomb thrower came into its own as he managed to get a couple of shots away (try doing that indoors with a Bazooka or Panzerschreck!) which didn’t do any damage but this attention and the smoke blocking its view caused the tank to withdraw. Meanwhile 9 Pltn was quickly winning the firefight with the Germans in the central orchard whittling the defenders down quickly.

Next up 7 Pltn advanced through the orchard and spotted an enemy AT gun and immediately took it under fire from 2 sections and the platoon 2″ mortar, pinning the crew and causing casualties. About this time too the Company CO along with the 3″ Mortar FOO moved into the rear of the village and immediately got on the blower to bring down fire on the German section in the central orchard to help nullify the threat there and to help the attack progress. The mortars came in quickly and bang on target (a feature of the day happily for me!) and with the combined efforts of the fire from 9 Pltn and the stonking pretty soon the defenders were all killed with only their NCO seen legging it for safety. Now that this position was cleared 1 Pltn was ordered up out of the village to move towards the vacated enemy position. I also called the Churchills forward to advance between the village and 9 Pltn on the right as I now knew the location of the enemy tanks and thought this position would be a good one to hold them in before committing them further.

Over on the right 9 Pltn pushed a section along the hedges towards the farm to check it out which was countered by the Germans moving their Panzer IV across behind the farm on our right flank and firing on them, which was quickly countered by a smoke round from the 2″ completely blocking it’s view causing it to withdraw and allowing 9 Pltn to move the PIAT team forward under its cover. With that threat dealt with 9 Pltn then advanced the remaining 2 sections out of the cover of the orchard aiming for the hedges to the left of the farm which unfortunately wasn’t as empty as I thought and erupted with the terrifying sound of a MG42! The resulting fire decimated one section and caused casualties in the other one supressing them both. However fire from the third section lining the hedge, the platoon mortar and supporting fire from the tanks and 1 Pltn quickly eliminated this new threat and the lone survivor was seen abandoning the MMG and making for the rear.

Meanwhile, over on the left flank, 7 Pltn had slipped a section out of the orchard tasked with working around the flank of the enemy AT gun which was still being shot up by the rest of the platoon to assault what remained. Unfortunately they instead were taken under brutal close range small arms fire from an enemy infantry section located just inside the treeline. Although the section suffered terribly the enemy also suffered from a withering fusillade from the remainder of the platoon which quickly either killed or routed the ambushers. With the threat of the enemy infantry gone and the AT gun also neutralised 8 Pltn pushed quickly through 7 Pltn’s position and deployed ready to push through the woods with 7 Pltn now moving into reserve as per plan. 8 Pltn were soon in action as their left hand section made contact with the retreating crew of the AT gun and much to everyone’s surprise came off worse in the ensuing close combat! Then the tank that had been in the wood earlier appeared at the rear of the wood and started lobbing very inaccurate HE shells about (poor Philip had terrible luck doing this all day much to my amusement). 8 Pltn quickly pulled their men back and the shout went up “Bring up the PIAT”, and with that the plucky team dashed forward through the trees but couldn’t quite get into a position to get a shot off. Luckily for them though the German tanker ordered his vehicle to reverse and the driver gave it a bit too mush and the metal beast presented itself side on, the first shot from the PIAT missed but the team worked quickly and got another off which slammed into the tank and caused it to brew up immediately! With the enemy seemingly cleared from the wood 8 Pltn then sorted itself out into formation to await further orders.

And then the tank battle started. After being thwarted in its attempt to chew up 9 Pltn by judicious use of smoke the Panzer IV on our right moved round to the left of the farm again and started to engage the Churchills and a tank duel quickly started which seemed to take over the battle for a good while, and resulted in one Churchill being knocked out but the Panzer IV suffering slightly from non-penetrating hits that caused it to briefly pull back out of line of sight of the remaining two British tanks. This was also when a third Panzer IV revealed itself and lurched forwards making for the right of the wood and looking to insert itself between 8 & 1 Platoons whilst using the orchard to cover itself from my tanks. Once again the shout went up for the PIAT and the ever ready Jenkins from 1 Pltn rushed forward into the road through the orchard and with his last 2 rounds dispatched the advancing Panzer. With the death of this tank the Churchill troop commander ordered his other surviving tank to sweep round the orchard along the main road to try and take the remaining Pz IV in the flank either dispatching it themselves or in concert with his tank. Sadly this wasn’t to be as the Germans had a Jenkins of their own and it was ambushed by a hidden Panzerschreck team as it neared the burning wreck of the recently brewed up panzer.

Taking stock of the situation I knew that I had wiped out one enemy section, one was reorganising and badly shot up in the cornfield on the left past the woods, one MMG and an AT gun were also kaput and 2 tanks were knocked out but I knew the enemy must still have some troops left so I decided to soften up some possible locations before renewing the attack. I had already been mortaring the wood to the rear of the battlefield as I figured that is where I’d place an AT gun if I was defending but now decided to switch fire to the two buildings either side of the road just past the wood. After I had stonked this position for a bit I was going to push 8 Pltn through the wood to take the buildings and hence secure the exits from the village. 7 Pltn were to get ready to advance through 8 Pltn once this was completed whilst over on the right 9 Pltn, whose two sections still stuck in the open were now taking harassing fire from the remaining panzer, would try to go for the PIAT hat-trick whilst the remaining Churchill moved up to help. 1 Pltn was to wait for the last Pz IV to be taken care of before moving into the central orchard and setting up a base of fire to help 7 & 9 Pltns to advance further.

Unfortunately for me my mortars, which had been spot on all day, now decided to go way off target and the stonk on the two houses landed way off over on the left flank landing on the shot up enemy section in the cornfield. More misfortune followed as the two sections from 8 Pltn that I was moving up under cover of the barrage stepped out a bit too lively and just broke cover from the woods triggering an ambush by an enemy section lurking in the flowerbeds, the devastating close range fire saw the PBI take casualties and they fell back to the edge of the wood. Luckily the mortars were dragged nearly back onto the original target and the ambushing German section now found themselves under the fire of the battalion mortars. However this didn’t mean the end of the suffering of 8 Pltn as a MMG configured MG42 now opened up from the edge of the cornfield further piling on casualties and causing the 2 sections to break back through the woods. While this sanguinary scene was playing out over on the right 9 Pltns PIAT team had worked its way along the edge of the farm through the pigsty and was ready to fire a shot off on the last panzer. Philip was now fully suffering from PIAT terror and switched the tanks full attention on the plucky team killing one of them and causing the survivor to fall back into the pigsty (insert own jokes here!). What this did do, however, was to allow my Churchill to move up into a position to take the German tank under fire again which it did, and whilst hitting the target didn’t cause it to brew up it did convince the already rattled crew to bail out and head for the rear.

With this action we decided to call it a day. Philip’s lads had put up a very spirited defence causing a lot of casualties to my lads with both 8 & 9 Platoons suffering a section+ losses each and my supporting Churchills down to 1 tank too. However with my mortars now on target and causing casualties to the Germans in the flower beds and the largely intact 1 & 7 platoons ready to move forwards once the mortars had finished their work we said that the Germans would have withdrawn and the Brits would have consolidated on the line they held from the far edge of the wood, the central orchard and along to the farm. So the scene is set for the next battle when B or D Company take over but will probably be facing a fresh German unit.

Many thanks again to Des for putting the game on and for Philip for being a cracking opponent as usual, it was a tense but fun affair with a grate narrative and some fantastic bits of action. Also I do have to say again what a joy it is playing on such a terrific table, top work Des!

Prairie Grove, Arkansas, December 7th, 1862: 15mm ACW, Fire & Fury

Once again I made my way round to Des’ magnificent Shed o’War for another game and this time it was for a game of my first wargaming ‘love’, ACW. We would be using Des’ lovely 15mm collection and the new edition of the excellent Fire & Fury brigade level rules.

The scenario we would be playing is the Battle of Prairie Grove where a small Union force of 2 brigades from the Army of the West is chasing a Reb force from the Army of the Trans-Mississippi that has turned to engage at the great defensive position along the wooded ridge and hopefully destroy the pursuing force before the rest of the army catches up. The Confederates had more bases in their units but the Union had a qualitative edge, I was taking the role of the Union commander. The one thing changed from the scenario as written was the dismounted cavalry was replaced with infantry.

Map of the battle from the Confederate Lines

My plan was quite simple: I was going to take the Rebs under fire with the batteries of Herron’s Division from the Knoll and once I had seen off or destroyed their batteries, I would advance Orne & Huston’s brigades to ‘The Bench’ and try and work round the flank or assault their line if it had been weakened by my artillery once it had switched targets from the enemy guns. I was expecting another Division to enter the battle between points A & B on the map and would direct them as required but my initial thoughts were to use them to aim towards the Morton house to threaten the other flank of the Rebel line and tackle any reserves that might be lurking along the road.

The first few moves whizzed by as I moved my 2 batteries onto the knoll and edged my infantry forward to support them whilst engaging the Rebel artillery with Murphy’s battery from Crawford’s hill which was not going very well as they constantly failed to do much damage, luckily for me though neither was the enemy guns and soon the Knoll guns were in place. I used these to hit the small brigade of McDonald at the very end of the enemy line and soon I had caused it enough damage that it fell back out of the line and the guns turned their attention to Blocher’s battery and Shelby’s Brigade. The Rebel artillery was giving as good as it got however and one of the batteries on the Knoll became damaged but the concentrated fire of both batteries did manage to damage Blocher’s battery too and cause casualties on Shelby’s brigade which also fell out of the line, whilst further along the ridge Murphy’s battery had finally got the range sorted and had forced West’s battery to fall back damaged. Taking advantage of the fact that the Rebel guns were now weakened and another brigade had fallen back I pushed the infantry to the bottom of ‘the Ledge’ where they were in dead ground and unable to be fired at from the ridge above. Now I wanted to soften up the defenders with my guns before advancing and I also moved Orne’s large Brigade to the left to take advantage of the space where McDonald’s & Shelby’s brigades used to be.

It was about this time that my first reinforcing Brigade appeared over on the right but this good news was tempered by the sight of a mass of Confederate Infantry & Artillery appearing on the roads opposite, I quickly ditched any idea of attacking obliquely into the flank of the enemy before me and realised I’d have to use the reinforcements to tackle the newly arriving enemy forces head on. I therefore advanced my new Brigade forward a short distance and shook it out into a supported line to wait for the rest of its Division. Pretty soon the rest of Husson’s Division’s brigades with their attached 3 batteries of guns had arrived and I wasted no time in advancing them towards the masses of enemy advancing down the road, shrugging off the attentions of enemy artillery as they did so. My own artillery was also now in play and the concentrated fire of all 3 batteries was beginning to tell on the green rebel troops, causing them to become disordered and silencing their batteries.

Now, as twilight started to fall, the battle moved into the final stages as the infantry started to get to grips with each other. Over on the left I had decided to launch Huston’s brigade forwards in a charge on Fagan’s Brigade to tie them in place while Orne’s Brigade got into position on the left, unfortunately this attack which was stopped cold by the fire from the enemy infantry and the remaining guns across the road and a quick counter attack saw my brave boys retreating back to the safety of the foot of the shelf. However the Rebel infantry was now disorganised and Orne’s fresh and large unit slammed into the enemy line, bundling them back at an angle with some loss and destroying the remainder of Blocher’s battery. This did leave the victorious Union troops with enemy troops moving up on their flank but they were still fresh and in good order so would easily be able to turn to face the new threat with confidence.

On the right two separate attacks went in. The small but veteran left hand brigade of Husson’s Division attacked the equally small enemy brigade in front of the Morton house and won the contest handily but was then counter attacked by a newly arriving Rebel Brigade and even though they saw off the first attack, they were then hit in the flank and were forced to retire back to the gun line. Meanwhile, over on the right of the Division the other, larger, veteran brigade moved up to tackle the huge, but green, Confederates deployed near the Wilson house. This contest was in the balance for a while with the Rebs holding firm initially (I rolled a 1!) but the better experience of the Union forces began to tell and the Arkansas boys were soon falling back through the Brigade behind them.

It was at this time that Des decided that he would use the failing light (we had played 12 turns of 15)to cover his retreat and fall back as he had taken significantly larger losses than me (15 Infantry & 2 Guns vs 8 Infantry) and I had 3 fresh and better quality brigades plus a distinct advantage in guns with which to carry on the fight with, and so I managed to take the victory. As usual, many thanks to Mr Darkin for the game, it was a great blast and an interesting scenario plus it was great to be involved in some ACW action again – we’ll definitely have to play it again but switch sides.

15mm French Revolutionary Wars, General d’Armee Rules. Battle of Mont St Jean, July 1794.

I was perusing some photos the other day and I came across some from a game from a couple of years ago which I couldn’t post about at the time as I had run out of space to upload more pictures and I’d forgotten I had! As it was a bloody great days gaming and a fantastic spectacle to boot I thought I’d rectify that now. I can remember enough to give at least a broad outline of the events but there is tons of lovely eye candy to get your mince’s round so there is that at least!

I had been invited along with Des & Andy over to the Loughton club to take part in a large General d’Armee game which I happily agreed to. I’d been over to one before and had played in GdB games with some of the chaps from there before and they’d always been great games plus its always nice when you get to play with the author of the rules too. So it was an early start and I schlepped it across town to the leafy end of the Central line in the fair county of Essex and met up with Des who was on the same train. Upon entering the room that the game was in we were greeted with a satisfyingly huge table with an unmistakeable looking battlefield laid out. I must say I was a tad confused as Des had told me that we were doing a FRW game and that was definitely the field of Waterloo, but apparently it wasn’t the first time that French, British, Dutch and Hannoverian troops had fought over the same ground.

Des, Andy & I were all assigned to the Allied side and we were basically setting up in the same positions as the battle from 1815, along the ridge south of Mont St Jean with a garrison forward in Hougmont (apparently the lads in 1815 used loopholes made in this battle!). I was in charge of an Anglo-Hannoverian Division holding the far right of the line and also tasked with holding the famous châteaux complex and had Andy to my immediate left with a Division of British troops, as with all of these proper big battles I have no idea about what was going on elsewhere as soon as the action started apart from the fact that Des was in charge of the troops to Andy’s immediate left and that Martin was on the extreme left with a force of Dutch troops. Opposing us was the French Army of the Sambre et Meuse under Jourdan, with Dave Brown donning the large hat for the rascally sans culottes with a team of Loughton chaps taking various Divisions ready to smite us with revolutionary fervour.

The side table had Austrians taking the part of Prussians attacking the French at Plancenoit but apart from popping over there to take these photo’s I’m afraid I have no idea what happened there at all!

As to the battle, things are far too hazy for me to remember all the details but I do remember my defence of Hougmont didn’t go as well as the later battle’s defence did. I did manage to hold for quite a bit and caused the French attackers some problems in taking the complex but I was bundled out after a spirited defence. I do remember (as it is painfully seared into my brain) Andy and me both noticing a large gap opening up between the troops attacking the châteaux and those to their immediate right that we tried to attack into but were stymied by faltering units. Before we could sort the attack out however, Dave launched and an attack by ‘Panzer Dragoon Division Brown’ which steamed into the junction between our two formations and proceeded to carve through our units like a hot knife through butter whilst suffering next to no discernible damage, eventually ending up on our side of the ridge after causing multiple units to rout all along it’s route of mayhem. Elsewhere determined French attacks by the frenzied revolutionary levee en mass and excellent cavalry battered their way into our positions and although we had some local successes, particularly over on the extreme left early in the battle, we were forced back off the ridge in places and the battle was lost.

The game was great fun to be involved in, so many belated thanks to the chaps at Loughton Strike Force for allowing us to join in, and special thanks have to go to Gary who not only did a marvellous job of umpiring the game all day provided the figures which I’m sure you will agree were a joy to behold, it’s just a shame I couldn’t write it up at the time.

A bit of chilly CoC, 20mm Eastern Front

A couple of weeks ago I managed to get the first game in since early March round Des’ shed o’war. Sadly it looks like it will also be the last game in this year as new Covid restrictions have hit London, with my health problems and the ban on households mixing it is a non-starter (and rightly so). Anyway, Des had decided to lay out one of his lovely Eastern front winter tables and that we’d have a game of Chain of Command which was a big thumbs up from me in both accounts. We spent the first 45 minutes or so having a good chat as it was only the second time we’d physically been in each others company since March also so had a lot to catch up on/moan about! So with that out of the way and Des’ birthday beer opened we got to it.

View of the battlefield from my baseline

I was the glorious Red Army liberating a village from the fascist invaders and to do so I had a bog standard rifle platoon with a paltry number of support points that I blew on a lend-lease Churchill that I thought would come in handy against the flimsy structures in the village and might have more chance surviving a ‘fausting or ‘schrecking from the German infantry (it was also in honour of a Twitter chum DiceDad and his love of the brutes!). The patrol phase went ok, I ended up with my JoP’s spread out a bit but nearly encircling Des’ which were grouped quite tightly. I was planning on using typical Soviet subtlety by running the infantry forward on the left to make the enemy deploy then bring the tank up, stand off and blast the crap out of them – I was quite confident the Churchill would be safe in this as I figured Des wouldn’t be able to afford a PAK40 from his support points. (you can click on following pics to make them bigger)

The game was bags of fun, albeit one lacking in much finesse as I struggled to get forward with the first section I deployed due to the nasty attention of a MG42 and a lack of cover so decided to try and engage in a long range firefight whilst working another squad down the left. I did have some success chipping away at Des’ lads causing a MG42 team to break (this was due to us forgetting to count the shock across the section and not just the team!). I did manage to push the left hand squad up but Des deployed another one of his and a viscous close range firefight broke out with us slowly whittling each other down, lots of shock was going on and JL’s were getting hit which slowly brought our morale levels down. Eventually though my first squad stuck in the open had enough and broke whilst nearly all the remaining troops on both sides were pinned causing a stalemate.

On my right I had moved a section forward hoping to force Des’ hand to deploy his last section whilst supporting them with the Churchill. This sort of worked but Des sprung an ambush with his Panzerschreck which luckily for me missed, I was very confident that a touch of HE would put paid to the AT team but I completely missed! The next few bounds saw a frankly ridiculous set of misses from us both as we both tried to get the first telling hit in, although the ‘schreck did score a glancing blow on the Churchill that luckily just shocked the crew. My infantry joined in and managed to cause some shock whilst taking fire from a MG42 although the Churchill did finally knock out the ‘schreck team whilst they ran back to acquire some more rounds after using up all of their initial load of rockets.

With the threat of the tank and an infantry section closing in on them Des’ last infantry squad ran out of the building they were in and round the corner out of sight, and it looked like it might go all Benny Hill for a moment with us chasing each other round the house! However I decided to hold the infantry in place to take on the Landsers while I moved the Churchill up to take the JoP located nearby and hopefully catch the same Germans in a crossfire. Unfortunately I forgot that taking on a MG42 at close range even with light cover was a really bad idea and before I could get the tank in a position to brass the enemy up my infantry had taken a right mullering and broke.

With that my morale was down to 6, I had one section of infantry fit to fight and a train to catch we called the game as a German victory. To be fair I don’t think either of us was too bothered about the result it was just great to be sat round a table again, having a couple of beers and playing a game with a mate, it has been much missed. The only real down side was that I had to do it all with Des’ bog standard kit on his half-arsed table but we all have to make sacrifices in these troubled times!

Old Hickory CoC Campaign. Fight 3, Red 2.

“Don’t worry sir, we’ll get it done”, and with that Leutenant Hitzelperger gave a smart salute and left headquarters to see to his men. After 1.Zug had been beaten back, 3.Zug were supposed to have had a go at kicking the Yanks back door in but had been prevented by a Jabo attack. Hitzelperger was still smarting after his unit had suffered the same fate earlier and also wanted to show the CO and that upstart Beckenbauer that he could be successful where others had failed, and if he had been able to carry out his initial attack they would be on the objective by now.

He had taken advantage of some better patrolling and also didn’t want to make the same mistakes as the initial attackers had so had decided to concentrate his attack along the right, hopefully crossing from ‘his’ hedgeline to the ‘American’ hedgeline at the place where the distance was shortest and was out of the view of any men stationed in the houses. As the patrolling had identified this spot as a likely place the enemy would be manning he decided to take it under fire with one of his Gruppe and an Infantry Gun from the support chaps. When this force had won the firefight here another Gruppe spearheaded by a Flamethrower team would advance and secure the hedgeline before rolling up the enemy position. His remaining Gruppe would face across the field to the end of the wood where the wire was located as it was also likely that the enemy had forces there and hopefully they could cover any nasty surprises popping up. He entered the building where his men were waiting, quickly went through the plan again with his NCO’s and that grinning idiot Klopp from HQ who was coming with them to assist, and waited for the guns of the artillery to start up before leading his men out.

Fight 3 Red 2

As soon as they reach the forming up point the Leutenant turned to his men “Right, Krankl move your men over to the left and cover that flank, the rest of us will be moving out soon but we need you to cover us first”. The wiry Austrian’s heart sank, ‘cover us’ actually meant ‘draw the enemy’s fire so we know where they are’ but orders were orders and so he moved off through the orchard and across the next paddock. Soon afterwards some Americans were spotted along the hedgerow and the young officer motioned to Klopp to join him, “Feldwebel, take 2.Gruppe and the gun, get up to the hedge and blow those Yanks away. I’m going to stay here with the rest and wait for the right moment to attack. Understood?”. Klopp nodded grimly and moved his small command out knowing full well that the enemy would have the drop on them.

Just then the horrible sound of exploding mortar shells erupted where 3.Gruppe had moved off to and an agonised scream was heard as they were caught in a well aimed stonk. Pausing for just a moment Klopp told Rumminigge to get his men up to the hedge and to start firing whilst he saw to the siting of the gun. As 2.Gruppe reached the hedge his fears were realised and they were hit by a terrific volley which ripped through the cover momentarily checking the men with the shock of the sudden, violent contact. They quickly regained their composure, however and poured their own fire back which was joined by the fire from the gun. This combined fire must have been effective though as the enemy mortar fire started to slowly shift towards them so as to neutralise the threat they must have been on the enemy infantry. Klopp made sure that they ignored the approaching barrage and kept firing although, unfortunately, 2.Gruppe was not having the best of luck with quite a few men being hit including Rumminigge who suffered a slight wound.

bty
2.Gruppe take up position…

bty
… but the Ami’s are waiting

bty
The Infantry Gun starts its brutal work

bty
3.Gruppe take a stonking and Krankl is wounded

bty
2.Gruppe take casualties, Rumminigge is hit but Klopp is on hand to help

Then all of a sudden the mortar barrage stopped. Hitzelperger immediately left the Flamethrower and 1.Gruppe with the Adjutant to await his signal to advance and ran over to see what had happened to 3.Gruppe. He found Krankl wounded but organising his men and helped to restore order. They had lost a few men but were reasonably ok and he ordered them forwards telling the Stabsgefreiter to make for the wood across the road and to try and work round to the left when he thought it was safe to do so. Meanwhile over on the right Klopp and his force had finally won the firefight duel with the Americans who’s few survivors broke for the rear dragging their wounded NCO with them, and he grabbed one of the wounded men from 2.Gruppe telling him to let the Leutenant know now might be the time to launch the attack on the enemy.

cof
The Americans start to lose the firefight…

cof
… huge gaps appear in their line…

cof
… which finally breaks

Before this could be organised however another squad of the enemy appeared in the same position along the hedge but Klopp and his lads had the range good and proper now and laid down a furious fire that seemed to do great damage to the enemy if the slackening in return fire was anything to go by. When the flamethrower then hit the enemy as it came onto the line it helped finish off the survivors with that the flame team surged forwards followed by the newly arrived 1.Gruppe. Klopp was just thinking that the end must be in sight when all of a sudden the world to his left and front disappeared in a maelstrom of noise, dust and metal as another mortar barrage hit. Luckily it didn’t last very long and had missed both the Feldwebel and the attacking force, as well as only hitting one of the gun team but it had destroyed the survivors of 2.Gruppe, all were casualties apart from one dazed landser.

cof
The charge is on to take out the new American section

cof
But could this new mortar barrage be the end?

cof
The assaulting troops luckily manage to dodge the incoming rounds!

cof
But the damage is already done on the new Ami section

cof
Although this beast did awful damage to the unlucky Krankl’s men.

As this was happening on the right Krankl had began to move his men towards the wood when they were caught by the combined fire of both a squad in the first house and an Anti-Tank gun that suddenly revealed itself in the wood by the wire. His men were pinned under this murderous crossfire and pretty soon the surviving member and the wounded NCO were running back to where they started. Hitzelperger had also thought that the Americans must have been defeated and now he was worried that his men would be the ones breaking but luckily all enemy fire stopped and soon the men advancing on the right sent back a message that they could see the Yankees streaming for the rear They had done it, only just, and at a terrible cost but they had done it. The road to L’Abbaye Blanche was open.


This was one of the tensest and bloodiest games of CoC that both Dan and I had played in a long while with both of us having periods where we were on top and both desperately trying to get that final hit on the other to cause a rout.

I very nearly pulled out early doors after the first gruppe was caught by the initial mortar barrage and the second gruppe started taking casualties from the enemy squad across the field, especially as both their JL’s were wounded too. I managed to roll a triple 6 though and then it was my turn to start racking up casualties on the Americans and I thought the tide had turned. However Dan carried on his great rolling on the BTH chart from last week whilst I carried on my bad rolling which was of some concern as he started with a FM of 11 and I started on 9.

After seeing off the first American squad Dan chucked another into the grinder at the same place definitely looking to finish off 2.Gruppe but I lucked out again with some double phases and poured fire on from the gun and remaining MG42’s with a dash of help from the Flamethrower and some appalling luck on Dan’s rolling for hits saw the second squad finished off with only the wounded SL and JL’s present remaining. I really thought it was game over for Dan but he managed to get the mortars into action again, virtually wiping out 2.Gruppe. He also battered 3.Gruppe, that I had stupidly left hanging out in the open whilst I concentrated on destroying the enemy to the front, with a terrible crossfire virtually wiping them out before they broke. Again, luckily, I managed to cancel the mortars, this time by using a CoC dice which also saw the surviving members of his first squad rout off the table and it was now the last chance saloon for both of us with his FM at 3 and mine at 2.

My intact section with the flamethrower were in a great position to take a JoP and then take on the American’s in the house with the Infantry Gun helping out and I was hoping that would be enough for the win, as long as Dan’s mortars didn’t start up again. When he failed to get the mortars again and wouldn’t be able to call on them for the rest of the battle Dan decided to pull out much to my relief. The one thing I did learn in this fight above everything else was this: if you are playing Germans get yourself a le18 75mm IG, why has it taken me this long! Dan declared it the man of the match, it only has 6 HE but the ability to drop cover by 1 and hitting on a 4+ makes it punch well above its weight.

As for the state of 2.Zug. Their opinions first, they started on 1 & 1 and after the battle these had dropped with the CO’s opinion on 0 and the men’s (not surprisingly given the casualties taken) at -3. They are also pretty much a spent force with 4 men dead in both 2. & 3.Gruppen so I’ve decided to consolidate the survivors into one full strength Gruppe under the surviving 3.Gruppe JL and am sending the 2 ‘spare’ men to 1.Gruppe/1.Zug to replace their losses from the last fight. Next up is the village fight in L’Abbaye Blanche with the full strength 3.Zug taking on what I estimate to be a full strength American platoon backed up with a bunch of MG’s and AT guns so, should be easy?!


Old Hickory CoC Campaign. Fight 2, Red Two

Beckenbauer furiously tried to light his pipe after leaving the room containing Company HQ, when he failed for the fourth time he swore loudly and kicked out at the lamppost in front of him. After 1.Zug’s brilliant little action 2.Zug were supposed to have moved forwards to carry on the fight but they were caught moving up to the startline by a JaBo strike and the useless bastards had scattered all over the place so now it was up to his lads to attack once more. He had argued against it of course but 3.Zug were off doing something else and time was of the essence (plus him and the CO weren’t seeing eye to eye at the moment), so his protests weren’t too forceful. He knew the job needed doing and that they would have to do it, he just wanted to keep his lads out of harms way for a little longer.

As they were supposed to be resting, and due to the confusion around caused by the airstrike, the patrolling of the new area to attack hadn’t gone as well as it had previously and the Yankees had managed to secure a nice line centred on a house with good supporting positions to either flank that covered a large open expanse of ground in front of it. There was a nice covered approach to the left flank but that had been somewhat blocked off by a thick barbed wire obstacle. HQ had decided that the open terrain was probably well covered by hidden AT guns so was holding back the panzer support until the positions had been identified and neutralised, indeed the Old Man had stressed that this was the most important element of this attack. To compensate for this though he was being supported by a battery of 81mm mortars from the Support Company which he was hoping would help shoot his lads onto the enemy positions once they were identified and also the artillery would be shelling the American lines as well, also his men’s morale was still very good after their last victory.

IMG_20200217_192114
Red dots are German JOP’s, Blue are American

cof
My freshly made wire blocks the way!

He arrived back to the unit’s forming up area and called his NCO’s around him and they listened to his plan. As usual Beckenbauer would take 1. & 2. Gruppe forward in the attack whilst the ever ready Klopp would take control of the tripod mounted MG42 and the Adjutant would hold 3.Gruppe back as a reserve. The main attack was still going to be through the wood that extended along the left but instead of continuing through the wood they would cross the road once they reached the barbed wire and try and outflank the Ami’s position from the left. While they were doing this the heavy MG42 and the FOO would take any spotted enemy around the house and on the right under fire to keep them busy. 3.Gruppe would support where needed. Once all the NCO’s nodded that they were clear on their parts, Beckenbauer pulled his cap tightly down over his eyes and looked at his watch “Right, those lazy Mummy’s boys in the artillery should start up in 2 minutes, lets get moving. Good luck”.

cof

The lads of 1.Zug move out again

The advance through the wood was going smoothly enough with both 1. & 2.Gruppe making their way steadily forward when all of a sudden a murderous fire erupted over on the right. From the sound of it, the Americans were doing the shooting which started up again as soon as it finished. Beckenbauer was nudged by Klinsmann ‘I hope Jurgen’s alright over there boss’. Klopp was alright, but the men manning the MMG definitely weren’t. Due to the poor patrolling earlier they had to move quite a way forward to take up a position from where they could take the enemy under fire. Unfortunately the enemy were already in place and waiting when they did so, unleashing a couple of murderous volleys that cut down 3 of the crew and made the remaining 2 run back towards their own lines. They were halted by the big Swabian Warrant officer who temporarily checked their progress but they were too shaken to convince that getting back into action was a good idea. As he was trying to sort the MG team out Klopp did notice the mortar observer moving forward on his left “Get those bastards on the right” he shouted across to him whilst thinking that maybe he should call for 3.Gruppe to come forward to help out. Unfortunately, whilst he was thus distracted, the MG gunners slipped away to the rear their morale completely shattered.

The Amis wait on the right

cof
The survivors of the MMG team make for the rear

The sound of incoming mortars were very soon filling the air but it was the sound of the enemy’s and not the German’s. The barrage fell across the road quite near to where Beckenbauer had started to move 2.Gruppe over to try and take on the GI’s firing on the MMG, an idea he quickly changed when he saw the mortar rounds seemingly move closer “Jurgen, get your lads back here and follow 1.Gruppe around to the left” he bellowed over the crumping of the incoming rounds, “those damned mortars will get us soon if we stay here”.  As they all moved back to the left another ripple of enemy fire burst out from the direction of the road which was quickly followed by the unmistakable sound of 2 MG42’s opening up in response. At about the same time the mortar barrage stopped and Beckenbauer heard another seemingly more intense round of firing from the Americans and a very feeble return volley from 1.Gruppe. Calling on everyone to follow him he charged forwards to the lane where he was met with a terrible scene. Breitner lay dead in the road and one half of his men lay dead or wounded around him with the survivors pinned by the nearest hedge whilst down the road the opposite hedge was bristling with GI’s who unleashed another volley. “Smoke!, Smoke!, get a grenade in there now!” but the nervous lad that threw it just about cleared the hedge barely covering the survivors who used the cover of it to quickly vacate the death trap they were in and head for the rear dragging their wounded comrades with them.

cof
American mortars miss their target…

cof
… but creep ever closer

cof
Breitner’s lads make it into the ‘Lane of Doom’

cof
Damned Yanks move across to take them on

cof
The scene just before the carnage ensued

” Verdammt! Back!, get back now!” bellowed the platoon commander and pretty soon they were all back in the safety of the woods. Beckenbauer stopped to think. He couldn’t hear any sound of the heavy MG or mortars firing over on the right which didn’t feel good at all and looking around at the faces of the remaining troops with him he could tell what they had seen in the lane had shaken them all up too. “Sod it, we are off. Klinsmann follow me, we’re pulling out, send a flare up to signal to Klopp. No sense in dying here for no gain”, and with that the attack failed.


So another short and sweet fight but this time the Dice Gods had switched sides and Dan had the better luck (hopefully it means that it will be a bit more even next time)!

Dan had called in the airstrike so this was now round 3 of the campaign and, as explained, my plan was to try and find his AT guns and try and take them out if possible so that if we had to attack here again the tanks could be used with a bit more safety, whilst hopefully writing down his infantry. However, I did make some mistakes which combined with terrible luck scuppered the attack which I was quietly confident in succeeding with when we started as I had rolled up 11 in morale to his 9 and my high men’s opinion gave me one extra support point.

Firstly I shouldn’t have deployed the MMG at all, the Yanks were in position and on overwatch already I should have just hit them with my mortars and just used it either to defend my 2 JOP’s on the right (along with my reserve section) or deployed it on the left after moving that JOP forwards with a CoC dice. Over on the left I think my plan to still advance through the wood and around the wire was a good one and it might have worked. Indeed when Dan brought in his mortars he was way off target (was supposed to come in on the wire which might have caught 2 sections and the SL) and was having problems moving the barrage – we are playing that you roll a d6 to see how far you can move it, he rolled a 1 then a 2! However it was creeping towards me so I spent a CoC dice to end the turn which meant the survivors of the MMG team routed off with my rolling on the BTH table starting high and staying high all game.

So what actually happened in the ‘Lane of Doom’? After getting caught with a very ineffectual volley which only caused a bit of shock I returned fire and scored 12 hits which only caused just 2 points of shock, and it was close range too! Unfortunately this fire was on a 2 so I couldn’t order a smoke grenade to be thrown as well to cover myself and Dan made excellent use of the American ability to both move and fire to get more weapons to bear and his next volley caused proper damage including wounding Breitner and reducing his activations to 1. Before I could reply though he used a CoC dice to interrupt and that’s when Breitner and the rest of one of his teams copped it whilst the other one broke. Dan then rolled up a triple 3 ending the turn and thus routing the survivors, on top of the hits to my force morale from the JL being wounded then killed and losing a team my force morale had plummeted to 2 so it was a no brainer to pull out.

Again a cracking game and lessons definitely learned for next time. I know I might have said this before but playing these rules in a campaign just makes them so much better – you stop thinking like a wargamer and start thinking like a commander.

As for the result of the fight: I only managed to KO 2 of Dan’s men but he will get them back thanks to the difference in morale at the end. 1.Zug lost 5 men in total , 2 dead along with the JL and 3 will be returning the next time they see action. Beckenbauer lost 4 points off his men’s opinion but as he was already on +3 that isn’t too bad whilst he managed to not lose any more on the CO’s opinion so starts the next round at -1 & -1.

Colours 2019 Preview: ACW, Battle of Antietam. 15mm Fire & Fury.

I don’t know, you wait ages for some ACW action then…

A few weeks ago now I had the absolute pleasure of being invited round Andy’s to take part in a playtest of the Antietam game that he and a few of the South London Warlords are putting on at Colours this year. As I was supposed to be playing in Daren’s Kursk game I wouldn’t have been able to join them so jumped at the chance to have a go (even more glad now as we’ve had to call off the Kursk game so I would have missed it at the show!). As any of you might remember from the stunning Plancenoit game Andy put on I was dead keen to check this out, especially as we had been privy to snaps of the build from Andy over a good number of weeks as he made the terrain and it was looking ace.

The rules used for the game will be the new edition of Brigade Fire and Fury, which are great by the way, and the figures come from Andy and Des’ beautiful 15mm collections. I won’t bore you with a detailed AAR as this post is just going to be a feast for the eyes but it was a tough fight and you could see why it was such a bloody one historically. Doug and I, playing the Confederates, were gradually pushed back from the Western Woods and the hill by both weight of numbers and weight of shot (the massed Union guns were brutal!). However this came at a huge price to the attacking Union forces and when we finished the Rebel reinforcements were just arriving to knock them back again. Des was completely made up that his lads had made it to the Sunken Lane despite some accurate and deadly long range artillery fire from my guns but he didn’t manage to break into the position at the first go – again we had to stop just as things had got interesting!

It was a marvellous day’s wargaming and many thanks to Andy and Mrs. T for being such great hosts and Andy, Doug and Des for a great game. I’m sure it is going to be a wow game for all you lucky punters at the show!

All pics are clickable for a better view.

Club Night 01/04/19: France ’44, 15mm IABSM/COC

After the last game of IABSM I was moaning about the card activation and how I thought it slowed things down and increased the chance of you sitting there doing nothing for large parts of the game if you were unlucky in the card activations (or if, as happened to me once, someone forgot to add a card into the deck after coming off the blind). Des had a think about it and came up with a very simple but ingenious way of combining the dice activation from CoC with the core rules.

Activation was much the same as in CoC, 5 dice being rolled, but scaled up: 1 activated a team/section, 2 a platoon, 3 a Big Man 1 or 2 (i.e. a JL), 4 a Big Man 3 (a SL), 5 added a pip to a ‘Bonus’ die, and 6’s went to a ‘Tea Break’ dice. Multiple 6’s were treated the same as in CoC so 2 gave you another go (we used our system of decreasing the activation dice by 1 die every time). The ‘Bonus Dice’ was added to until you hit 6 pips (basically a CoC dice) whereupon you could pick a card from the bonus card deck. As soon as the ‘Tea Break’ die hit 6 – which was added to by both sides’ rolls – a Tea Break was called.

As well as the activation system from CoC we were using a similar support points system and so both sides had a core infantry company and a set amount of points that we could spend to beef things up. We would also be using the Force Morale system too with points lost for ‘Bad Things Happening’.

The scenario we would test these out with was nice and straightforward. Andy and I had to take a small village somewhere in the Bocage country. Facing us was the all singing and dancing  ‘Kamp Gruppe Bartram’ led by Daren. We managed to set up a rather spiffing table with the club’s terrain and Des’ lovely ‘Empires at War’ Normandy buildings (the 15mm versions of the ones seen on this blog before). The main picture below shows our view of the battlefield, and we hit upon a nice simple plan. I would take 2 of our platoons of infantry and push through the orchard to the right of the road whilst sending our recce jeep along the right flank whilst Andy would take our Sherman platoon along the left supported by the remaining infantry platoon. The enemy would be pinned in place once discovered then destroyed.

Things started very well with all of us getting into the swing of the new activation system easily enough. We decided to push my attack through first and soon I had 2 platoons in the Orchard and the jeep barrelling around bocage as it headed for the lateral road on the right. Then the shit hit the fan. My lads in the orchard must have been fresh from England as they failed to spot the PanzerGrenadiers that lined the hedge at the far end of the orchard until they opened up a murderous fire on my Napoleonic looking column. Pretty soon I was in all sorts of trouble as the German machine guns chewed through section after section and soon one of my platoons was pretty much out of action. My return fire was not the best but I did manage to cause some casualties assisted by the company mortars but I was forced to pull back out of sight to regroup and re-asses whilst the Germans slipped away to take up new positions in the village.

Just when I thought things were pretty bad they got worse. My recce jeep bumped into something along the road and I actually felt my jaw drop when Daren gleefully put out 2 Tigers – indeed both Daren and Des laughed at my re-action. I did have a go at one of the behemoths with my .30-cal before scooting back desperately trying to get into cover but both efforts were futile and one of the giant beasts pumped a HE shell into the plucky Jeep.

As the right flank was now well and truly shut down we decided that Andy best get forward on the left so he pushed his Shermans forward followed by the infantry. However pretty soon the sharp crack of an 88 signalled the appearance of 2 more Tigers! The American tankers tried valiantly to take on the big cats but pretty soon their Platoon commander and one other tank were burning. There was one small glimmer of hope though as the remaining infantry platoon managed to creep forwards whilst the tank duel was going on and soon a couple of bazooka teams were in position to get a flank shot at one of the Tigers. If they could get a successful shot away we might just be able to overpower the remaining one with the concentrated fire of the surviving tanks. But it wasn’t to be, the GI’s manning the rocket launchers were just too jittery and their missiles either sailed harmlessly past the massive tank or glanced off the thick steel (how they missed is still puzzling me, just how do you miss a Tiger side on?!!). Daren then turned the Tigers turret on the hapless bazooka men who would have been blasted to atoms if they weren’t close assaulted by a fresh platoon of PanzerGrenadiers.

With this further defeat Andy and I decided that enough was enough, most of our infantry was knackered and our tanks had been well and truly assaulted by the Tigers so we decided to concede defeat. Strangely though the surviving tanks disappeared during the retreat, and even stranger when we tried to get them on the radio to ask where they were we received this message back: ‘Woof, woof’. Odd.

Despite the defeat it was a cracking game and we all agreed that the new activation system vastly improved things and even I said I’d love to have another game so hats off to Mr. Darkin for coming up with the rules, we did come up with a few tweaks here and there but nowt too much which shows how well they worked.  Apart from the rules more thanks to Des for putting the game on and for bringing his lovely village set, the figures and models were Daren’s but now in the collection of Andy which is great as we  will still get to play with them as they are crackingly well done.

If you are interested in the new activation rules at all you can find them here – Des has called them: ‘Oh what a total bummer’: https://www.facebook.com/groups/216703912095462/files/

(I think: ‘I aint been CoC’d Mum’ was better but apparently that’s a bit rude?!)

As it was so nice and we didn’t get anywhere near it in the fight here’s some gratuitous shots of the lovely village! (available from here: https://www.empiresatwar.co.uk/15mm-NORMANDY-KITS.html)