I was perusing some photos the other day and I came across some from a game from a couple of years ago which I couldn’t post about at the time as I had run out of space to upload more pictures and I’d forgotten I had! As it was a bloody great days gaming and a fantastic spectacle to boot I thought I’d rectify that now. I can remember enough to give at least a broad outline of the events but there is tons of lovely eye candy to get your mince’s round so there is that at least!
I had been invited along with Des & Andy over to the Loughton club to take part in a large General d’Armee game which I happily agreed to. I’d been over to one before and had played in GdB games with some of the chaps from there before and they’d always been great games plus its always nice when you get to play with the author of the rules too. So it was an early start and I schlepped it across town to the leafy end of the Central line in the fair county of Essex and met up with Des who was on the same train. Upon entering the room that the game was in we were greeted with a satisfyingly huge table with an unmistakeable looking battlefield laid out. I must say I was a tad confused as Des had told me that we were doing a FRW game and that was definitely the field of Waterloo, but apparently it wasn’t the first time that French, British, Dutch and Hannoverian troops had fought over the same ground.

The very recognisable field of battle 
The small table in the background has Plancenoit on it
Des, Andy & I were all assigned to the Allied side and we were basically setting up in the same positions as the battle from 1815, along the ridge south of Mont St Jean with a garrison forward in Hougmont (apparently the lads in 1815 used loopholes made in this battle!). I was in charge of an Anglo-Hannoverian Division holding the far right of the line and also tasked with holding the famous châteaux complex and had Andy to my immediate left with a Division of British troops, as with all of these proper big battles I have no idea about what was going on elsewhere as soon as the action started apart from the fact that Des was in charge of the troops to Andy’s immediate left and that Martin was on the extreme left with a force of Dutch troops. Opposing us was the French Army of the Sambre et Meuse under Jourdan, with Dave Brown donning the large hat for the rascally sans culottes with a team of Loughton chaps taking various Divisions ready to smite us with revolutionary fervour.

The end of the line 

Hannoverian garrison in Hougmont 


These French Dragoons weren’t very nice 

A lovely Highland battalion 
Andy’s lads on my left 

My British Brigade echeloned on the right flank 
Des’ lads 
Martins command hold the extreme left 
Boo! 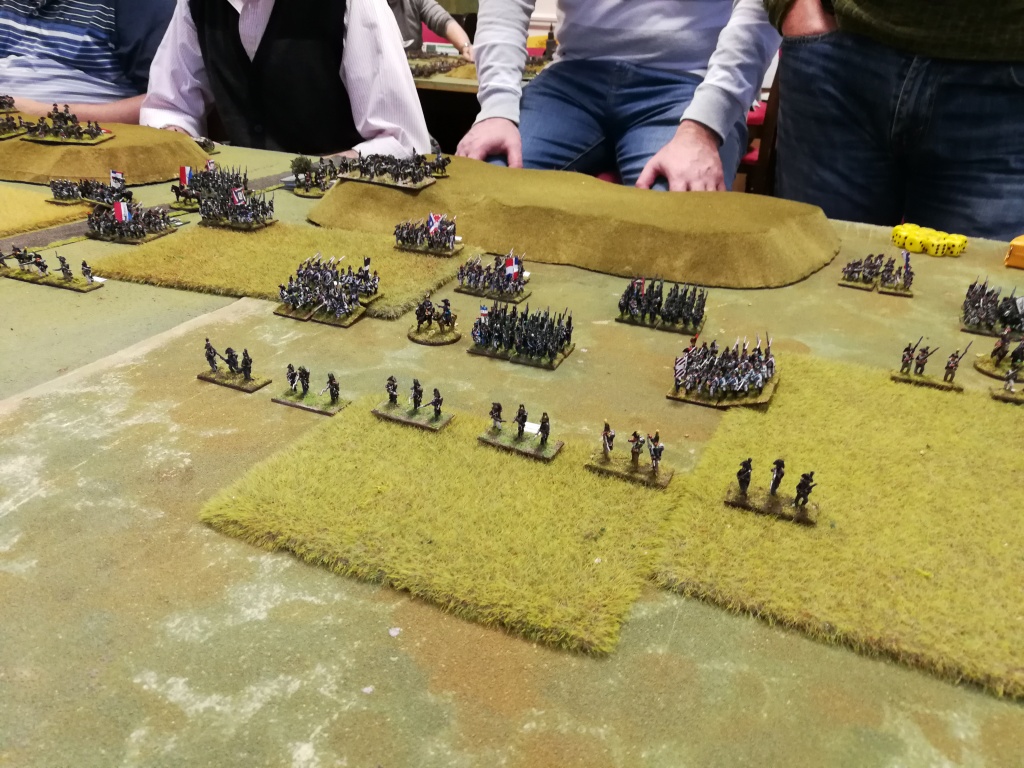
The dastardly French!
The side table had Austrians taking the part of Prussians attacking the French at Plancenoit but apart from popping over there to take these photo’s I’m afraid I have no idea what happened there at all!


As to the battle, things are far too hazy for me to remember all the details but I do remember my defence of Hougmont didn’t go as well as the later battle’s defence did. I did manage to hold for quite a bit and caused the French attackers some problems in taking the complex but I was bundled out after a spirited defence. I do remember (as it is painfully seared into my brain) Andy and me both noticing a large gap opening up between the troops attacking the châteaux and those to their immediate right that we tried to attack into but were stymied by faltering units. Before we could sort the attack out however, Dave launched and an attack by ‘Panzer Dragoon Division Brown’ which steamed into the junction between our two formations and proceeded to carve through our units like a hot knife through butter whilst suffering next to no discernible damage, eventually ending up on our side of the ridge after causing multiple units to rout all along it’s route of mayhem. Elsewhere determined French attacks by the frenzied revolutionary levee en mass and excellent cavalry battered their way into our positions and although we had some local successes, particularly over on the extreme left early in the battle, we were forced back off the ridge in places and the battle was lost.

Here they come 

Des’ lads hold La Haye Sainte 

1st Cavalry clash 
Boom! 


Lovely looking units… 


Gits 
The French reach the ridge… 
…and the garden at Hougmont 
Thousands of the buggers! 


the garden falls 


Hannoverian rear guard in action 


Panzer Dragoon Division gears up in the distance 
Dave contemplates victory! 


First part of Hougmont falls… 
…but second part holds 
they keep on coming though 


I had retreated from the last section… 
…and the victorious French launch themselves at my line 

A battery gets a hoofing 


At the end, at my end 
A couple to try and show the whole field… 
…just before we called the game.
The game was great fun to be involved in, so many belated thanks to the chaps at Loughton Strike Force for allowing us to join in, and special thanks have to go to Gary who not only did a marvellous job of umpiring the game all day provided the figures which I’m sure you will agree were a joy to behold, it’s just a shame I couldn’t write it up at the time.


