On Friday I went round to fellow South London Warlord Mac’s house to have a game of Chain of Command. This was only my 4th game of this great ruleset and I think Mac’s second, although he has played a few solo games. The scenario we picked to use is the second battle from the ‘Operation Martlet’ Pint Sized Campaign booklet but was just being played as a one off.
I had the following troops available to me (I don’t like being SS units so have swapped in 21st Panzer!):
Core Platoon:
- Senior Leader
- 3 x Sections of Junior Leader & 2 x 3-man LMG teams (each section has 1 Panzerfaust)
- 1 x Pz IVH with Junior Leader
I spent my 7 points of support thus:
- 5 man Rifle section and Junior Leader (4 rifles, 2 smg)
- Panzerfaust for the above section
- Adjutant
- Entrenchment for the Pz IV
- British Motor platoon
- Sherman
- Mortar observer
- Extra PIAT team
- Vickers MG
We decided that the Brits wouldn’t have to suffer the effects of fog. I didn’t come out of the force morale very well as I ended up with ‘8’, Mac did better and ended up with ’10’. His pre-match good luck didn’t end there unfortunately as he rolled a 6 for the free moves that he would get in the patrol phase which automatically put me on the back foot. Bugger.

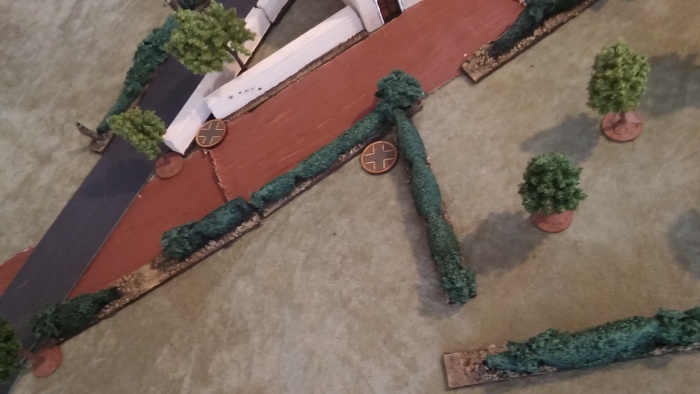
Mac managed to push his patrol markers up quite far with the free goes he had and so I decided to just try and pin him as quickly as I could whilst ensuring that I secured the terraced houses by the road in the walled complex and the wood opposite, unfortunately the smaller house in the walled complex was unreachable which was a shame as I had planned to try and secure that.
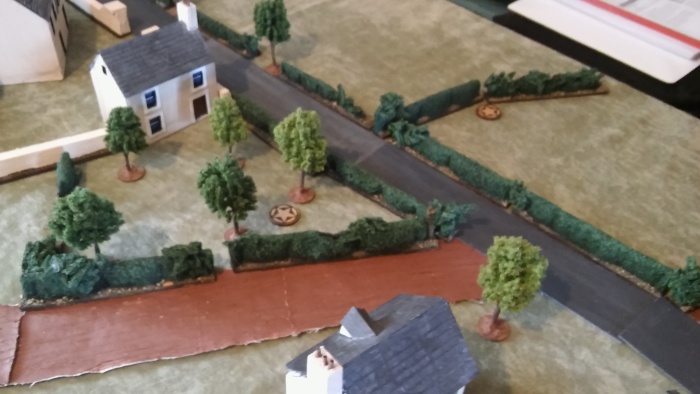
Mac rolled well for his initial phase and deployed a couple of sections onto the table straight away, one along the hedge covering the open field. The second was placed in the wood right next to the house so would manage to get in straight away. I managed to get a couple of 5’s in my first roll and failed to anyone on the table due to the British bombardment. Mac then brought his tank on, as well as his last section straight into the house nearest his baseline and the 2″ mortars whilst he moved a section into the house from the wood. I then lucked out with a triple 6 and ended the first turn whilst managing to bring on a section and my emplaced PzIV. The infantry section moved towards the hedge facing the Brits whilst the tank was brought on to cover the open field on the left, it fired on the Sherman but didn’t manage to cause any damage. I used the next phase to get the infantry onto the hedgeline and deployed the ‘spare’ rifle team in the wood ready to leg it across the road to move into the terraced houses thereby hopefully stopping the Brits from moving across the courtyard.


Mac and I traded shots between the tanks to no avail whilst the British squad along the hedge at the end of the field started to relocate towards the small wood by the building complex to dodge any attention from the tank. The 2″ mortar tried to lay down some smoke in the road to cover the Sherman but their aim was right out and it hit the building occupied by the Brits in the farm complex. The round rolled down the roof and started a smokescreen in the courtyard much to the amusement of myself, Mac weren’t too happy mind.
In the phase immediately after this I rolled 4 6’s! This I hoped would result in a building catching fire as two of the buildings were packed with Mac’s troops and after the smoke round hitting one of them it would be quite a good bit of narrative, but I rolled pants – got the collaborator/patriot option and Mac put his 3″ Mortar observer on. Cheers dice gods, you definitely giveth and taketh away.
I then made a decision that I think lost the game for me. Whilst I was happy that I had bottled up Mac’s section in the house by putting my rifle section in the house opposite and the Pz IV had succeeded in closing down that large field on the other side of the board I recklessly pushed forward my section that was lining the hedge to cover the junction further up. The stupid reasoning behind this was to take the Brits moving along the lateral dirt track under fire from a longer range hopefully pinning them and thus preventing them from advancing further.


However, Mac had moved his Sherman onto the lateral road out of line of sight of my Pz IV and the section that he had on overwatch in the building there opened up on 1st Section as they hit the hedgeline, causing one KIA, a bit of shock but also wounding Obergefreiter Klinsmann who now only had 1 activation for the rest of the game. Mac then moved the Sherman along enough so that it could add its HE and HMG fire to the small arms coming from the house and soon I was one team down with the other team pinned.
I deployed my Platoon Leader onto the table and moved him through the wood towards the beleaguered team, ordering them to fall back over the hedge so that they could be rallied. This would allow Mac to start moving the Sherman and the section from the house over to the junction knowing the coast was now clear. At the same time he had brought in a spotting round for his medium mortars which landed in the wood by the compound, way off where he wanted it and far too close to his lads in that building and the section he had in reserve skulking in the wood.
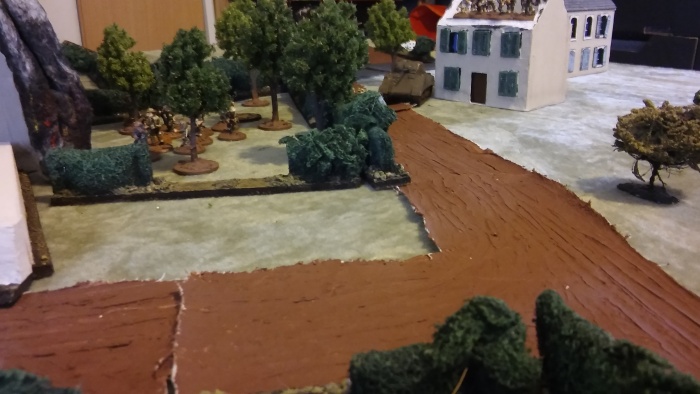

I then brought on the rest of my force, deploying one squad across the road along the hedge and started moving them tactically forwards, I also started backing my tank out of the entrenchment to get him into the fight and to take on the Sherman. My last section I brought on in the wood to move up and cover the remnants of 1st Section. Mac had also started to move up to the junction where Klinsmann’s section met their fate with 2 sections and his Sherman.
The next significant thing to happen was when Mac realised that his planned mortar strike would not only hit my lads but would also potentially take out half of his force as well! So he used an opportune double phase to shift his reserve section out of the wood and onto the lateral road whilst moving the spotting round up further. This still meant that the chaps in the house would still be caught in the blast area so he had a decision to make, stay in the building or leg it out the back into the wood and hope that he could move the 4″ to safety – choosing the latter he duly rolled 3. I thought it was funny anyway!


The mortar stonk did well though, hardly warranting the term ‘friendly fire’. However it put shock on my newly arrived section in the wood, wounded Lt Beckenbauer and caused the remains of 1st Section to break. Even playing a CoC dice to end it didn’t work as Mac just played one of his to keep the barrage going. The Sherman had now reached the junction and opened up on the newly arrived section, this combined with the mortars piled the shock on and they were soon pinned.
Over on the other side of the battlefield Schumacher in his tank seemed to be not quite up for the fight as he had just managed to crawl forwards a wee bit and then Mac deployed a Vickers along the hedge at the end of the field and let rip on my sneaking 2nd Section. Obviously he rolled really well over the next 2 phases and even with me going tactical he caused casualties and a bunch of shock.


So, with two remaining sections loaded with shock and with one pinned and under fire from a HMG and the other about to be fubared by a tank I decided to call it a day and retreat. Having thought about it afterwards I could have fought on but my Force Moral had now fallen to 4 and I think Mac was still on 10, so things weren’t looking good.
It was a good game and I think if I played it again I would have definitely waited for Mac to have come to me and hopefully chopped him up with my MG42’s at close range. I would have definitely got the panzer out of the entrenchment sooner as well. I think Mac enjoyed it too even though I know he doesn’t like the variable movement – especially when he doesn’t escape his own barrage – and hopefully he will be up for playing another some day. Many thanks to him for putting the game on (and telling me how he made his lovely hedges!), it was an absolute pleasure playing him, a true gentleman wargamer.
We did discuss the differences between CoC and Bolt Action (which Mac usually plays) and I reckon it is like the difference between draughts and backgammon – both use the same pieces but one is a lot more involved and subtle than the other.

A great write up mate.
It was a good game with lots of tense moments and a few funny ones!! damn stupid FO calling down the support on top of my units!
I must admit I am liking CoC more and more even if the movement still feels odd…
My MMG ambushing your squad by the hedge was probably the highlight of the game for me.
The “friction” in the game works really well, there were a few nail biting moments when rolling those order dice.
Mac
LikeLike
Glad you enjoyed it mate, I reckon going for a campaign will make it even better………
The Vickers ‘coming for tea’ wasn’t my favourite bit at all!
I think I maybe did you a dis-service in the write up though as I thought you fought the battle really well, exploiting my weakness whilst keeping casualties to a minimum – very British in ’44!
LikeLike
Great AAR one point tho a double six does not end the turn – it gives you the next roll.
A triple 6 ends the turn
LikeLike
Ah, that’s a typo! Thanks for pointing it out.
LikeLike